Azure DevOps Agent in Docker with Deployment Groups

Recently started learning how to user Azure DevOps, formerly VSTS, to do automated build and deploy tasks to several docker hosts. In this POC I am running I will have about 600 machines running docker in remote locations to act as an edge/branch server. These docker hosts will be running 5-6 containers to handle basic services such as DNS, FTP, FTE and PowerShell for automation. I wanted an easy way to deploy and update containers on these 600 remote machines. I looked at various things from using Rancher to custom PowerShell scripts to hit the docker API and/or SSH into each machine and run the docker commands. For this post, we are going to focus on how I accomplished these tasks using Azure DevOps.

Microsoft has already released pre-built Docker images for the VSTS agent (https://hub.docker.com/_/microsoft-azure-pipelines-vsts-agent). While this worked great it only allowed me to register the agent into an agent pool in DevOps. In my case, I wanted the agent to register with a deployment group so I could run the same task on every agent. Turns out Microsoft has no documented way of how to accomplish that. So I started digging through how they built their container, the agent looks exactly like the one they install on Linux (no surprise there) which they do provide instructions for on how to register the agent in a deployment group. So now its just down to getting the container version to accept the options for deployment groups. Heres how I did it.

Pull the image down from the hub to your localhost. In this case, I want the agent to have the docker command line utilities installed so I can interface with docker on the host through the Unix socket. Microsoft has an image already built for this:

docker pull  mcr.microsoft.com/azure-pipelines/vsts-agent:ubuntu-16.04-docker-18.06.1-ce 

Now, if you look at the directions in DevOps on how to deploy an agent to Linux (Pipelines > Deployment Groups > Register) you will find that two options are needed that are not in the documentation for the docker based agent, nor is the container from Microsoft setup to accept these options. Those options are –deploymentgroup and –deploymentgroupname.

After inspecting the image we can see that it is launching the start.sh script. CMD /bin/sh -c ./start.sh

This script can be downloaded from github here:
https://github.com/Microsoft/vsts-agent-docker

To make this do what we need we will need to modify the start.sh script and then build a custom container with our changes.

#Lines 40-46
if [ -n "$VSTS_DEPLOYMENTPOOL" ]; then
  export VSTS_DEPLOYMENTPOOL="$(eval echo $VSTS_DEPLOYMENTPOOL)"
fi

if [ -n "$VSTS_PROJECTNAME" ]; then
  export VSTS_PROJECTNAME="$(eval echo $VSTS_PROJECTNAME)"
fi

#Lines 91-100.  Remove --pool. 
#Add --deploymentgroup, --deploymentgroupname, --projectname

./bin/Agent.Listener configure --unattended \
  --agent "${VSTS_AGENT:-$(hostname)}" \
  --url "https://$VSTS_ACCOUNT.visualstudio.com" \
  --auth PAT \
  --token $(cat "$VSTS_TOKEN_FILE") \
  --work "${VSTS_WORK:-_work}" \
  --deploymentgroup \
  --deploymentgroupname "${VSTS_DEPLOYMENTPOOL:-default}" \
  --projectname "${VSTS_PROJECTNAME:-projectnamedefault}" \
  --replace & wait $!

Create a new dockerfile that will copy in your modified start.sh and build your new container.

FROM mcr.microsoft.com/azure-pipelines/vsts-agent:ubuntu-16.04-docker-18.06.1-ce

COPY start.sh /vsts

WORKDIR /vsts

RUN chmod +x start.sh

CMD ./start.sh

Now you can run your container. Specify your deployment group and project name as environment variables at runtime.

docker run -e VSTS_ACCOUNT=yourAccountName \
-e VSTS_TOKEN=yourtoken \
-e VSTS_DEPLOYMENTPOOL=yourpoolname \
-e VSTS_PROJECTNAME=yourprojectname \
-v /var/run/docker.sock:/var/run/docker.sock \
-d \
--name DevOps-Agent \
--hostname $(hostname) \
-it \
yourprivateregistry/devops-agent

And boom, achievement badge unlocked! You now have agents reporting to a deployment group.

PowerBI report for VMware using streamed dataset

Been “experimenting” with PowerBI lately and gotta admit, I kinda like it!  I am not a data sciency kinda guy but I can appreciate a nice dashboard that can supply data at a glance.  During my experimenting I have used PowerBI to plug into all sorts of data, from Citrix, to AD to CSV files and databases.  Today I will show you what I did around VMware using a PowerBI streamed dataset (API).  At time of writing, this feature is in preview, but it works so gets my vote for production deployment! 🙂

My first thought was to plug directly into the vCenter database.  All my vCenters are appliances that are using the built-in PostgreSQL DB.  PowerBI does have a connector for this DB so it is an option.  However, upon further reading it looks like I needed to modify some config files on the appliance and install some powerbi software to make the connector work.  All doable, but VMware does not officially support the changes needed to vCenter to allow remote database access.  As a result I was hesitant to mess with production vCenter.  No doubt it would work and everything would be fine but I had to take of my cowboy hat and be a good little architect (my boss might read this! 🙂 ) and find a supported path.  I tried several different methods to access the data I wanted.  For this post we will used the API method.

Streamed datasets in powerBI is a fancy name for API post.  Basically we are collecting data and using a REST post operation to post the data into PowerBI.  For this to work you will need a PowerBI Pro subscription.  Streamed datasets, from what I can tell, are only available on the cloud version of PowerBI, so the desktop app and free edition wont work for this method.

To get started login to PowerBI (https://powerbi.microsoft.com).  In the top right corner, under your pretty photo, will be a Create button.  Click that and select streaming dataset.

powerbi1

Select API and click next.

powerbi2

Next you will see a screen like this.  You need to fill out each field that you plan to post data to.  Fill in the info and click create.

powerbi3

Next you will be presented with a screen that displays the info you need to post data.  Select the powershell tab and copy the code output.  Will will use this later.

powerbi4

Now we need to create a powershell script that will connect to vCenter and pull the data we need.  This script will pull the data from vCenter using PowerCLI and then do a post to PowerBI.  (squirrel* why are all these product names starting with power? Is it supposed to make me feel powerful?)  Anywho, here is the script I wrote to get this done:


$vcenter = "vcenter host name"
$cluster = "cluster name"

Import-Module VMware.VimAutomation.Core
Connect-VIServer -Server $vcenter

#This line passes creds to the proxy for auth.  If you dont have a PITA proxy, comment out.
[System.Net.WebRequest]::DefaultWebProxy.Credentials = [System.Net.CredentialCache]::DefaultCredentials

$date = Get-Date
$datastore = Get-Cluster -Name $cluster | Get-Datastore | Where-Object {$_.Type -eq 'VMFS' -and $_.Extensiondata.Summary.MultipleHostAccess}

$hostinfo = @()
        ForEach ($vmhost in (Get-Cluster -Name $cluster | Get-VMHost))
        {
            $HostView = $VMhost | Get-View
                        $HostSummary = "" | Select HostName, ClusterName, MemorySizeGB, CPUSockets, CPUCores, Version
                        $HostSummary.HostName = $VMhost.Name
                        $HostSummary.MemorySizeGB = $HostView.hardware.memorysize / 1024Mb
                        $HostSummary.CPUSockets = $HostView.hardware.cpuinfo.numCpuPackages
                        $HostSummary.CPUCores = $HostView.hardware.cpuinfo.numCpuCores
                        $HostSummary.Version = $HostView.Config.Product.Build
                        $hostinfo += $HostSummary
                    }

$vminfo = @()
            foreach($vm in (Get-Cluster -Name $cluster | Get-VM))
        {
                $VMView = $vm | Get-View
                $VMSummary = "" | Select ClusterName,HostName,VMName,VMSockets,VMCores,CPUSockets,CPUCores,VMMem
                $VMSummary.VMName = $vm.Name
                $VMSummary.VMSockets = $VMView.Config.Hardware.NumCpu
                $VMSummary.VMCores = $VMView.Config.Hardware.NumCoresPerSocket
                $VMSummary.VMMem = $VMView.Config.Hardware.MemoryMB

                $vminfo += $VMSummary
            }

$TotalStorage = ($datastore | Measure-Object -Property CapacityMB -Sum).Sum / 1024
$AvailableStorage = ($datastore | Measure-Object -Property FreeSpaceMB -Sum).Sum / 1024
$NumofVMs = $vminfo.Count
$NumofVMCPUs = ($vminfo | Measure-Object -Property "VMSockets" -Sum).Sum
$NumofHostCPUs = ($hostinfo | Measure-Object -Property "CPUCores" -Sum).Sum
$HostVM2coreRatio = $NumofVMCPUs / $NumofHostCPUs
$TotalHostRAM = ($hostinfo | Measure-Object -Property "MemorySizeGB" -Sum).Sum / 1024
$TotalVMRAM = ($vminfo | Measure-Object -Property "VMMem" -Sum).Sum / 1024 / 1024
$NumOfHosts = $hostinfo.count
$NumOfHostsSockets = ($hostinfo | Measure-Object -Property "CPUSockets" -Sum).Sum

## This section is where you paste the code output by powerBI

$endpoint = "https://api.powerbi.com/beta/..."
$payload = @{
"Date" = $date
"Total Storage" = $TotalStorage
"Available Storage" = $AvailableStorage
"NumofVMs" = $NumofVMs
"NumofVMCPUs" = $NumofVMCPUs
"NumofHostCPUs" = $NumofHostCPUs
"HostVM2coreRatio" = $HostVM2coreRatio
"TotalHostRAM" = $TotalHostRAM
"TotalVMRAM" = $TotalVMRAM
"NumOfHosts" = $NumOfHosts
"NumOfHostsSockets" = $NumOfHostsSockets
}
Invoke-RestMethod -Method Post -Uri "$endpoint" -Body (ConvertTo-Json @($payload))


Now that we have data in the dataset you can create the report. Click the create button in powerBI (the one under your pretty picture) and click report.  It will ask your to select a dataset, select the one we just created.

In the fields selection area you will see all the datapoints we setup in the dataset.  Each one should contain the data that we just posted via the powershell script.

powerbi5

I am not going to get into how to use powerBI during this post as there are plenty of google-able blogs that have already been written on the topic.  But for a quick example, this is what my initial report looks like.

powerbi6

The sky is the limit here when it comes to how you present the data and build your report.  PowerBI is a really neat (and currently cheap) tool that Microsoft offers to build good looking dashboards and reports.  This example is just what I started with in an attempt to play with streamed datasets.  You can add/remove as many data points as you want to build this report out as you wish.  You can also use this method on other stuff outside of just VMware.  VMware is just the product I choose to test with.

Some limitations to this method.

  1. once data post into the dataset it cannot be removed.  Streamed datasets are a preview feature at time of posting so this may not be true in the future.
  2. data is not real-time.  Only refreshes when the powershell script runs.
  3. PowerBI cannot manipulate data, only report on it.  If it can I have not found it yet.  This means you cannot do math on two sets of data to come up with a third datapoint.  Thats why you see math being done via powershell and then posting the result to powerBI for reporting.  pCPU to vCPU ratio is a good example of this.


Adding Multiple Disks to VMs with PowerCLI

I don’t know about all of you, but it seems like I get a request to build a new SQL server every couple weeks.  Whether or not we should have that many SQL servers is a different matter, but we do, so I got tired of building the same thing over and over.  You could just build a VM template just for SQL deployments or you could do it using Powershell like I am writing about.  Our SQL DBAs have a certain configuration they want to be laid down on each new SQL server we pump out.  The problem.. its 12 disks.  yes, 12.  So I have to add 12 disks to the VM, then initialize them, then format them and mount to the correct location.  It takes a while and its boring so I want to get it over with ASAP and move on to more youtu… err work..

Before we start, assumptions here are that you already have a VM deployed from a template and its running.  For this script, I have added a 2nd SCSI controller (Paravirtual) to the VM for all the SQL Disks.

Adding disks to the VM

This will add the disks I need to the VM.  If you looking at this and thinking; you’re not using RDMs for SQL?  You’re using Thin provisioning for SQL?  You’re not using different Datastores for each disk?  Are you crazy?.  The answer, yes, yes I am.  But let us stay on topic and not get into the weeds for this post.

Connect-VIServer vcenter.domain.com
$VM = get-vm -name yourvmname

New-HardDisk -CapacityGB 50 -StorageFormat Thin -Controller "SCSI controller 0" 
New-HardDisk -VM $VM -CapacityGB 250 -StorageFormat Thin -Controller "SCSI Controller 1"
New-HardDisk -VM $VM -CapacityGB 50 -StorageFormat Thin -Controller "SCSI Controller 1"


Do all the “stuff” inside the VM

The script is pretty easy to read and is pretty self-explanatory.  Basically, it is doing all the steps I would have done by hand before.

#Bring Disks Online
get-disk | where operationalstatus -eq Offline | Set-Disk -IsOffline:$false

#Find RAW online disks and init with GPT
get-disk | where PartitionStyle -eq RAW | Initialize-Disk -PartitionStyle GPT

#Make mount point dirs
mkdir D:\DBDataFiles01
mkdir D:\DBDataFiles02
mkdir D:\DBDataFiles03
mkdir D:\DBDataFiles04
mkdir D:\DBLogFiles01
mkdir D:\DBLogFiles02
mkdir D:\DBLogFiles03
mkdir D:\DBLogFiles04
mkdir D:\TempDB01
mkdir D:\TempDB02
mkdir D:\TempDB03
mkdir D:\TempDB04

$i = get-disk -Number 2
New-Partition -DiskNumber $i.Number -UseMaximumSize
Add-PartitionAccessPath -DiskNumber $i.Number -PartitionNumber 2 –AccessPath "D:\DBDataFiles01"
Get-Partition –Disknumber $i.Number –PartitionNumber 2 | Format-Volume –FileSystem NTFS –NewFileSystemLabel DBDataFiles01 –Confirm:$false
Get-Partition -DiskNumber $i.Number -PartitionNumber 2 | Set-Partition -NoDefaultDriveLetter:$True

$i = get-disk -Number 3
New-Partition -DiskNumber $i.Number -UseMaximumSize
Add-PartitionAccessPath -DiskNumber $i.Number -PartitionNumber 2 –AccessPath "D:\DBDataFiles02"
Get-Partition –Disknumber $i.Number –PartitionNumber 2 | Format-Volume –FileSystem NTFS –NewFileSystemLabel DBDataFiles02 –Confirm:$false
Get-Partition -DiskNumber $i.Number -PartitionNumber 2 | Set-Partition -NoDefaultDriveLetter:$True

$i = get-disk -Number 4
New-Partition -DiskNumber $i.Number -UseMaximumSize
Add-PartitionAccessPath -DiskNumber $i.Number -PartitionNumber 2 –AccessPath "D:\DBDataFiles03"
Get-Partition –Disknumber $i.Number –PartitionNumber 2 | Format-Volume –FileSystem NTFS –NewFileSystemLabel DBDataFiles03 –Confirm:$false
Get-Partition -DiskNumber $i.Number -PartitionNumber 2 | Set-Partition -NoDefaultDriveLetter:$True

$i = get-disk -Number 5
New-Partition -DiskNumber $i.Number -UseMaximumSize
Add-PartitionAccessPath -DiskNumber $i.Number -PartitionNumber 2 –AccessPath "D:\DBDataFiles04"
Get-Partition –Disknumber $i.Number –PartitionNumber 2 | Format-Volume –FileSystem NTFS –NewFileSystemLabel DBDataFiles04 –Confirm:$false
Get-Partition -DiskNumber $i.Number -PartitionNumber 2 | Set-Partition -NoDefaultDriveLetter:$True


$i = get-disk -Number 6
New-Partition -DiskNumber $i.Number -UseMaximumSize
Add-PartitionAccessPath -DiskNumber $i.Number -PartitionNumber 2 –AccessPath "D:\DBLogFiles01"
Get-Partition –Disknumber $i.Number –PartitionNumber 2 | Format-Volume –FileSystem NTFS –NewFileSystemLabel DBLogFiles01 –Confirm:$false
Get-Partition -DiskNumber $i.Number -PartitionNumber 2 | Set-Partition -NoDefaultDriveLetter:$True

$i = get-disk -Number 7
New-Partition -DiskNumber $i.Number -UseMaximumSize
Add-PartitionAccessPath -DiskNumber $i.Number -PartitionNumber 2 –AccessPath "D:\DBLogFiles02"
Get-Partition –Disknumber $i.Number –PartitionNumber 2 | Format-Volume –FileSystem NTFS –NewFileSystemLabel DBLogFiles02 –Confirm:$false
Get-Partition -DiskNumber $i.Number -PartitionNumber 2 | Set-Partition -NoDefaultDriveLetter:$True

$i = get-disk -Number 8
New-Partition -DiskNumber $i.Number -UseMaximumSize
Add-PartitionAccessPath -DiskNumber $i.Number -PartitionNumber 2 –AccessPath "D:\DBLogFiles03"
Get-Partition –Disknumber $i.Number –PartitionNumber 2 | Format-Volume –FileSystem NTFS –NewFileSystemLabel DBLogFiles03 –Confirm:$false
Get-Partition -DiskNumber $i.Number -PartitionNumber 2 | Set-Partition -NoDefaultDriveLetter:$True

$i = get-disk -Number 9
New-Partition -DiskNumber $i.Number -UseMaximumSize
Add-PartitionAccessPath -DiskNumber $i.Number -PartitionNumber 2 –AccessPath "D:\DBLogFiles04"
Get-Partition –Disknumber $i.Number –PartitionNumber 2 | Format-Volume –FileSystem NTFS –NewFileSystemLabel DBLogFiles04 –Confirm:$false
Get-Partition -DiskNumber $i.Number -PartitionNumber 2 | Set-Partition -NoDefaultDriveLetter:$True


$i = get-disk -Number 10
New-Partition -DiskNumber $i.Number -UseMaximumSize
Add-PartitionAccessPath -DiskNumber $i.Number -PartitionNumber 2 –AccessPath "D:\TempDB01"
Get-Partition –Disknumber $i.Number –PartitionNumber 2 | Format-Volume –FileSystem NTFS –NewFileSystemLabel TempDB01 –Confirm:$false
Get-Partition -DiskNumber $i.Number -PartitionNumber 2 | Set-Partition -NoDefaultDriveLetter:$True

$i = get-disk -Number 11
New-Partition -DiskNumber $i.Number -UseMaximumSize
Add-PartitionAccessPath -DiskNumber $i.Number -PartitionNumber 2 –AccessPath "D:\TempDB02"
Get-Partition –Disknumber $i.Number –PartitionNumber 2 | Format-Volume –FileSystem NTFS –NewFileSystemLabel TempDB02 –Confirm:$false
Get-Partition -DiskNumber $i.Number -PartitionNumber 2 | Set-Partition -NoDefaultDriveLetter:$True

$i = get-disk -Number 12
New-Partition -DiskNumber $i.Number -UseMaximumSize
Add-PartitionAccessPath -DiskNumber $i.Number -PartitionNumber 2 –AccessPath "D:\TempDB03"
Get-Partition –Disknumber $i.Number –PartitionNumber 2 | Format-Volume –FileSystem NTFS –NewFileSystemLabel TempDB03 –Confirm:$false
Get-Partition -DiskNumber $i.Number -PartitionNumber 2 | Set-Partition -NoDefaultDriveLetter:$True

$i = get-disk -Number 13
New-Partition -DiskNumber $i.Number -UseMaximumSize
Add-PartitionAccessPath -DiskNumber $i.Number -PartitionNumber 2 –AccessPath "D:\TempDB04"
Get-Partition –Disknumber $i.Number –PartitionNumber 2 | Format-Volume –FileSystem NTFS –NewFileSystemLabel TempDB04 –Confirm:$false
Get-Partition -DiskNumber $i.Number -PartitionNumber 2 | Set-Partition -NoDefaultDriveLetter:$True

A couple interesting notes.  The “Set-Partition -NoDefaultDriveLetter:$True” needs to be run or the first time you reboot the VM all your disks will get a drive letter assigned to them.  Since we are using mount point here, we don’t need a drive letter.

Make sure the disk numbers match up to what is shown in disk management or via get-disk if your on core with no GUI.

I realize there are probably different ways to code this to make it shorter.  If that is something you want to improve upon then knock yourself out.  This was the quick and easy way I threw it together to GSD (get stuff done).

Storage Replica in Server 2016

One of the new features of 2016 Server (Datacenter edition only) that I have been playing with is storage replica.  I now have this technology running in production for one of our file servers.  Before storage replica came along, we were using DFS-R to replicate this particular set of data (~16TB, 27m files) to our DR facility for faster recovery.  Now anyone out there that has been using DFS-R for any length of time knows how much of a pain it can be.  Anytime we had a slight hiccup on any side of the replication link it would take weeks to get back to normal.  Granted, DFS-R has its use cases that work very well, but for a dataset this large it was nothing but problem after problem for me.  This is what made me look for alternatives that could be done quickly and cheaply.  In comes storage replica, a new feature in 2016 that is volume block-level replication.  I have tested this in a stretch cluster configuration and in a server to server configuration.  This post will focus on the server to server replication as that is what I decided to do for production.

Why server to server and not stretch cluster?

  1. Stretch cluster works with Synchronous replication only.  This is Microsoft’s official documented stance.  I found out that async will work with a stretch cluster but it will not failover automatically, it was a manual process to get it to failover.
  2. Our link did not meet the requirements for Sync replication.  Our wan link to DR is 10Gb with around 25ms latency.  MS recommends nothing over 5ms latency.  Now did I try sync over 25ms?  I sure did, I put the cowboy hat on and went to town testing all kinds of scenarios that were not officially documented or supported.  But did it work?  Yes, it did, quite well actually since the way Microsoft does sync replication it actually behaves more like async in reality.  Why not stretch cluster then?  Because this is a production set of data and Microsoft does not support sync over 25ms links (as of now).  I was not going to put us in an unsupported setup even though I think it may have worked just fine.

So server to server replication it is.  Here is the setup:

  • 16 TB of unstructured data on 1 volume
  • 2 VMs running on VMware with a standard 18TB vmdk.  RDMs will work too.
  • D drive is replicated, formatted in GPT NTFS, 8k Allocation unit size
  • Users access data using DFS-N

Steps to configure

Install features on both servers

Install-WindowsFeature -ComputerName SERVERNAME -Name Storage-Replica,FS-FileServer -IncludeManagementTools -restart

Add Disks and Format

Each server needs 2 disks.  1 for the data and another for the replication log.  In my setup, D is the data volume, L is the log volume.  Both formatted in GPT NTFS. D drive set to 8k blocks (default is 4k), this was to allow for a volume larger than 17TB.  Note: I have seen some info on the interwebs that have stated not to use storage replica for volumes larger than 10TB.  However, I can’t find anything in MS documentation that states that so I continued on full steam ahead.

2017-04-12 12_12_32-Clipboard

Verify your partitions sizes are exactly the same on both sides.  The best way to see this is to run  “Get-Partition -DriveLetter D | select size”.  Look at the size of the partitions on both servers.  This number should match (represented in Bytes).  In my case, these did not match exactly and I got an error back “Data partition sizes are different in those two groups“.  From the research I have done this is most likely due to the fact that these VMs were not on identical storage (Primary server on Tintri, Secondary on EMC VNX) and the NTFS format did some rounding differently on each VM.  To fix this problem, run “Resize-Partition -DriveLetter D -Size xxxxx”,  xxxxx being the size of the smaller volume.

Copy your Data over

I used robocopy with /mir to get the data copied to our new primary 2016 server.  You only need to copy to one of the servers, not both.  As soon as we fire up storage replica the initial block copy will get the data onto your secondary server for you (much faster than robocopy will, I promise you).  MS did mention that seeding the data “may” help the speed of this initial block copy.  During testing, I did not see a major difference in sync times if I seeded the data first.  Your mileage may vary.

Configure Storage Replica

Before turning this on, make sure windows is fully updated.  There were some bugs in the RTM version that were fixed in later updates.

Test Topology

This will create a pretty little HTML output to verify you have everything you need in place.

Test-SRTopology -SourceComputerName PrimaryServerName -SourceVolumeName d: -SourceLogVolumeName l: -DestinationComputerName SecondaryServerName -DestinationVolumeName d: -DestinationLogVolumeName l: -DurationInMinutes 5 -ResultPath c:\temp

If you have errors when running this, fix them before going on.

Create replication connections

New-SRPartnership -SourceComputerName PrimaryServerName -SourceRGName Groups-rg01 -SourceVolumeName d: -SourceLogVolumeName l: -DestinationComputerName SecondaryServerName -DestinationRGName Groups-rg02 -DestinationVolumeName d: -DestinationLogVolumeName l: -ReplicationMode Asynchronous

Warning: Make sure you get the replication direction correct!  If backwards you will replicate your empty volume over to your primary and wipe out all that data you just robocopied over. 

After you run this, the D drive will go offline on the secondary server.  Initial block copy will start.  Check status by running “get-srgroup”.

Another thing you will probably want to do is increase the log size. By default, it is set to 8GB.  I changed ours to 250GB by running these commands.

Set-SRGroup -LogSizeInBytes 250181844992 -Name Groups-rg01
Set-SRGroup -LogSizeInBytes 250181844992 -Name Groups-rg02

You can also run this handy snippet on the secondary server to see how much data is left to copy.

while($true) {
 $v = (Get-SRGroup -Name "Groups-rg02").replicas | Select-Object numofbytesremaining
 [System.Console]::Write("Number of bytes remaining: {0}`r", $v.numofbytesremaining)
 Start-Sleep -s 5
}

I found this initial replication to be very fast.  We moved 16TB of data to the secondary site in just under 24 hours.  DFS-R took weeks to move this same data.

Configure DFS-N

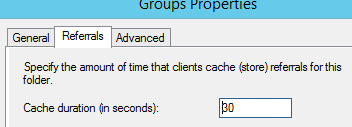
In our case, users were already using DFS-N to access the data.  However, we need to change some defaults to make this work the way I wanted.  By default, the namespace client cache is good for 1800 seconds (30 minutes).  The problem with this is if we failover to the secondary server, the users would need to reboot or wait up to 30 minutes for their drives to reconnect.  That could be a problem so I lowered the cache time to 30 seconds.  Yes, it will create a lot more referrals from your namespace servers but it will be worth it :).  To do this, open the DFS management console and open properties for the folder your working with.  Under referrals, change the cache duration to 30.

2017-04-12 13_21_34-Clipboard

Next, create the shares and add your primary server in as a target to the needed folders. Now, obviously, you need to be careful here and know what you’re doing with your data. This data is not replicated from your old server to the new, only robocopied over.  I am not going into all scenarios here on how that is a problem but just think about that for a few.

Now failover to your secondary server.  See the section below on how to do that.  You need to do this so the volume will come online to configure the shares on the secondary. Once the shares are created add the secondary server in as a DFS-N target.  Failover to the primary.

I keep the secondary server target disabled in DFS to prevent clients from trying to use a volume that is offline.

Failing over to secondary server

Set-SRPartnership -NewSourceComputerName SecondaryServerName -SourceRGName Groups-rg02 -DestinationComputerName PrimaryServerName -DestinationRGName Groups-rg01

Run the above command to bring the volume online on the secondary server and reverse replication.  Then run over to DFS and enable secondary target, disable the primary target. Clients should reconnect in 30 seconds or less.

Questions I still have

RPO by default is set to 30.  But what that means exactly I don’t know.  30 blocks, 30 seconds, 30 minutes, 30% of the log size?  I cannot find anything from Microsoft that explains it in detail.  My guess would be it is a percentage of the log.  I say that because before I resized the log to 250GB we would fall out of RPO pretty quick, after the resize we almost never fall out of RPO.

Update:  Microsoft answered this finally.  RPO is defined by seconds.

What is the recommended size of the log?  Percentage of active data may be or could be set to change rate times a certain RTO?  No clear guidance from MS.

Update:  https://docs.microsoft.com/en-us/windows-server/storage/storage-replica/storage-replica-frequently-asked-questions#FAQ15.5

Final thoughts

So far I have been impressed with how storage replica works.  It was fairly simple to setup, replicated data very fast and overcomes a bunch of DFS limitations and problems.

Positives

  • Fast replication
  • Replicates encrypted and locked files
  • decent visibility into replication status
  • Runs over SMB3  (side note, we did try and run this through a riverbed steelhead for testing, got about 30% reduction in WAN traffic)

Negatives

  • 1 to 1 replication.  Cannot do 1 to many like DFS.
  • manual steps to failover (unless you stretch cluster it)

References

https://technet.microsoft.com/en-us/windows-server-docs/storage/storage-replica/storage-replica-overview?f=255&MSPPError=-2147217396

https://technet.microsoft.com/en-us/windows-server-docs/storage/storage-replica/server-to-server-storage-replication?f=255&MSPPError=-2147217396

https://technet.microsoft.com/en-us/windows-server-docs/storage/storage-replica/storage-replica-frequently-asked-questions

Monitor Print Server Activity

I was recently approached by management and asked to monitor an older print server to see who was still using it.  They wanted a report that would show which users and machines were still using this print server so they could correct old printer mappings.  Well of course Microsoft gives us no easy way to do this out of the box so it was time to get creative.  Here is the method I used to enable logging and generate a nice pretty TPS report from the data.

Enable Print service logging on the print server
1. Open the event viewer
2. Expand application and service logs > Microsoft > Windows > PrintService
3. Right-click the operational log, click enable log.

Now that logging is enabled you will begin to see the logs fill up with print jobs (Event 307). I let this run for about a week so we could get plenty of data. You may need to adjust the size of the log because I found it filled up way too quickly. The default is 1MB which is stupid low.
Now on to generate a pretty report for these guys. As it turns out this sounds so easy but in fact is a PITA. You can export the log to CSV but there are several issues with this, the biggest one is it exports the users SID instead of username, which of course makes sense because we all know the SID for each user right? There are also several formatting issues with exporting to CSV and long story short, it just didn’t work, you’re welcome to try that on your own if you think I am crazy. What I really needed was a way to pull the XML params out of the detail section of each event and export that to CSV. To accomplish this we turn to our friend, Powershell.

$PrinterList = @()
$StartTime = "04/10/2014 12:00:01 PM"
$EndTime = "04/18/2014 6:00:01 PM"
$Results = Get-WinEvent -FilterHashTable @{LogName="Microsoft-Windows-PrintService/Operational"; ID=307; StartTime=$StartTime; EndTime=$EndTime;} -ComputerName "localhost"

ForEach($Result in $Results){
$ProperyData = [xml][/xml]$Result.ToXml()
$PrinterName = $ProperyData.Event.UserData.DocumentPrinted.Param5
$hItemDetails = New-Object -TypeName psobject -Property @{
DocName = $ProperyData.Event.UserData.DocumentPrinted.Param2
UserName = $ProperyData.Event.UserData.DocumentPrinted.Param3
MachineName = $ProperyData.Event.UserData.DocumentPrinted.Param4
PrinterName = $PrinterName
PageCount = $ProperyData.Event.UserData.DocumentPrinted.Param8
TimeCreated = $Result.TimeCreated
}

$PrinterList += $hItemDetails
}

#Output results to CSV file
$PrinterList | Export-Csv -Path "C:PrintAudit.csv"


This script runs locally on the print server and pulls all the info I needed and dumps into a CSV that can then be fondled within excel.  Optionally, you can run this remotely by changing the –ComputerName param at the end of line 4.  Of course, you do need to modify the start and end times to your needs.

VSS System Writer Missing

We recently upgraded our active directory controller from 2003 to 2008 R2.  After the upgrade the backup team came to me and said backups were failing on the new DCs.  Running a “vssadmin list writers” would show that the system writer was missing.  I tried running the usual repair process for VSS (permissions and reregister DLLs) but nothing was working.  Additionally, every time you restart the volume shadow service the following event would show in the application log.

Log Name: Application
Source: Microsoft-Windows-CAPI2A
Event ID: 512
Task Category: None
Level: Error
Description:
The Cryptographic Services service failed to initialize the VSS backup “System Writer” object.

Details:
Could not open the EventSystem service for query.

System Error:
Access is denied.


After some troubleshooting and Googling I found the answer.  The problem was with a GPO that was being applied to the DCs.  The GPO was put in place years ago by someone in the backup team to give their service account access to some of the services on the machine.  The problem was with the service EventSystem (COM+ Event System).  The SERVICE account needs read permission to that service for VSS to function properly, this permission was missing from the GPO.  I added the NT AUTHORITY/SERVICE account with read permission to the GPO and ran a GPUPDATE /force on the DCs.  Restart the Cryptography service and the volume shadow service and the system writer is now back and happy.